
On this page
Add a tool
Who can do this Admin (the Add tools right). Bringing in many tools at once is easier with Import.
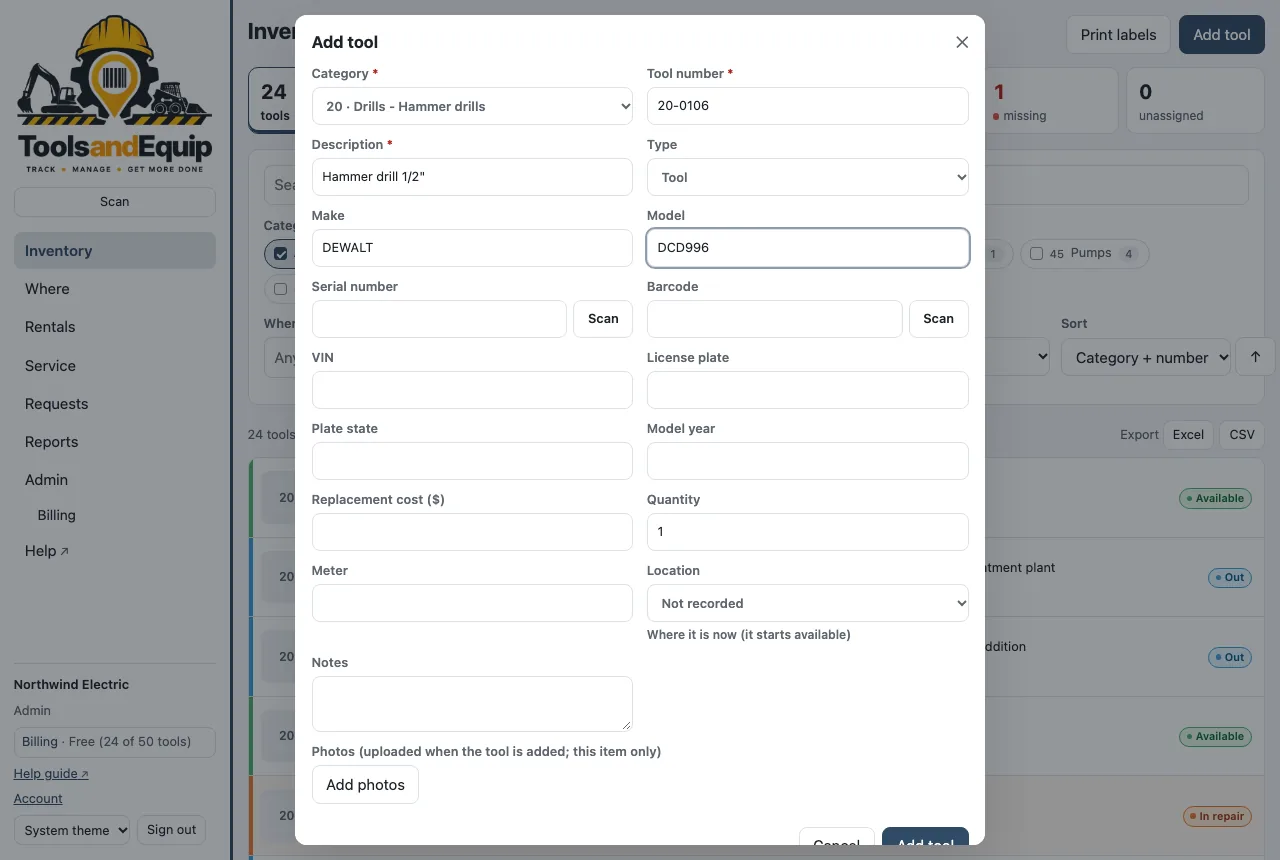
- On Inventory, press Add tool.
- Pick the Category. A Tool number is suggested from the category's next number. Change it if your tag says something else.
- Type a Description (required), then whatever else you know: type, make, model, serial number, barcode, VIN, plate, model year, replacement cost and quantity.
- Set Location (where it is now; it starts as available) and the Meter if it has one.
- Add photos if you like (below), then press Add tool. Its page opens.
Over your plan's tool limit after the grace period? Add tool is paused until the company is back within its plan. Moving and looking up tools keeps working. See Plans and billing.
Scan the barcode or serial
On a phone, tablet or laptop with a camera, a Scan button sits beside Barcode and Serial number. Point it at the maker's barcode or serial sticker. The field fills in and turns highlighted: Scanned: … Save to keep it.
Scanned something unknown with Scan at the top of the page? Admins get Add a tool with this barcode, which opens this form with the barcode filled in.
Tools & Equip label or barcode?
They are two different things:
- The Tools & Equip label is the QR label you print from Labels. It already knows which tool it belongs to. You never type it in anywhere.
- The Barcode field is for a barcode the tool already carries: the maker's, a rental company's or an old asset sticker. Fill it in so that scanning that old sticker finds the tool too.
If you scan a Tools & Equip label into the Barcode field, nothing is entered and the form tells you why, for example That's this tool's Tools & Equip label — it already works. If the label belongs to a different tool, it says which one.
Photos
Who can do this Adding photos on the tool page: Admin and Crib (the Photos right).
- When adding a tool: Take photo or Choose photos on a phone, Add photos on a computer. Up to 8. They upload once the tool is saved.
- On a tool's page: choose a photo, then pick This item only or Every {make} {model}, add a caption if you want, and press Add photo.
- A photo shared by make and model shows on every tool of that model. That saves taking the same picture 30 times.
Take photos in good light, close enough to read the name plate. Admins can find blurry or tiny photos under Admin → Photo quality.
Edit a tool
Who can do this Admin and Crib (the Edit tools right). Changing a tool's number also needs Change tool numbers (Admin).
On the tool's page press Edit, change the details and press Save. Edits show in the history. To change where it is or who has it, use the move buttons instead (see Moving tools).
Retire, reinstate or delete
Who can do this Admin (the Retire tools and Delete tools rights).
- Retire a tool that is gone for good. On its page, under Take it out of service, choose Why? (Sold, Scrapped, Lost, Stolen, Returned to vendor, Other), add a note and press Retire. It keeps its history and stops counting toward your plan.
- Reinstate: find it with Status → Retired, open it and press Bring back into service.
- Delete is only for a tool added by mistake that has no moves, service or requests. Anything with history can only be retired.
Admins can also tidy misspelt makes and models in one go under Admin → Make & model clean-up.