
On this page
People and members: what's the difference
- People (Admin → People) are everyone who can hold a tool: employees, foremen, subcontractors. Most of them never sign in.
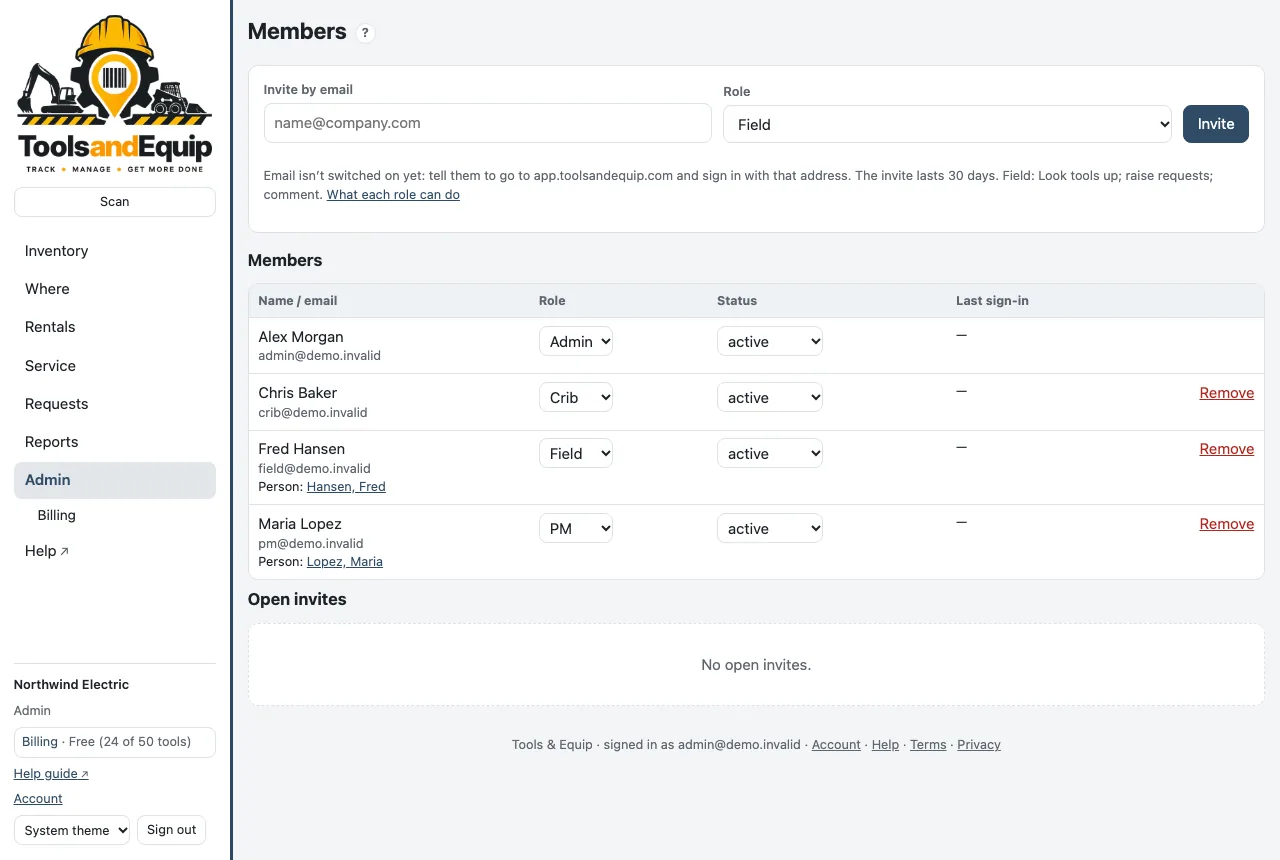
- Members (Admin → Members) are the people who sign in, each with a role.
A member can be linked to a person. The People list shows each person's App access: Signs in · role, Invite sent, or No app access.
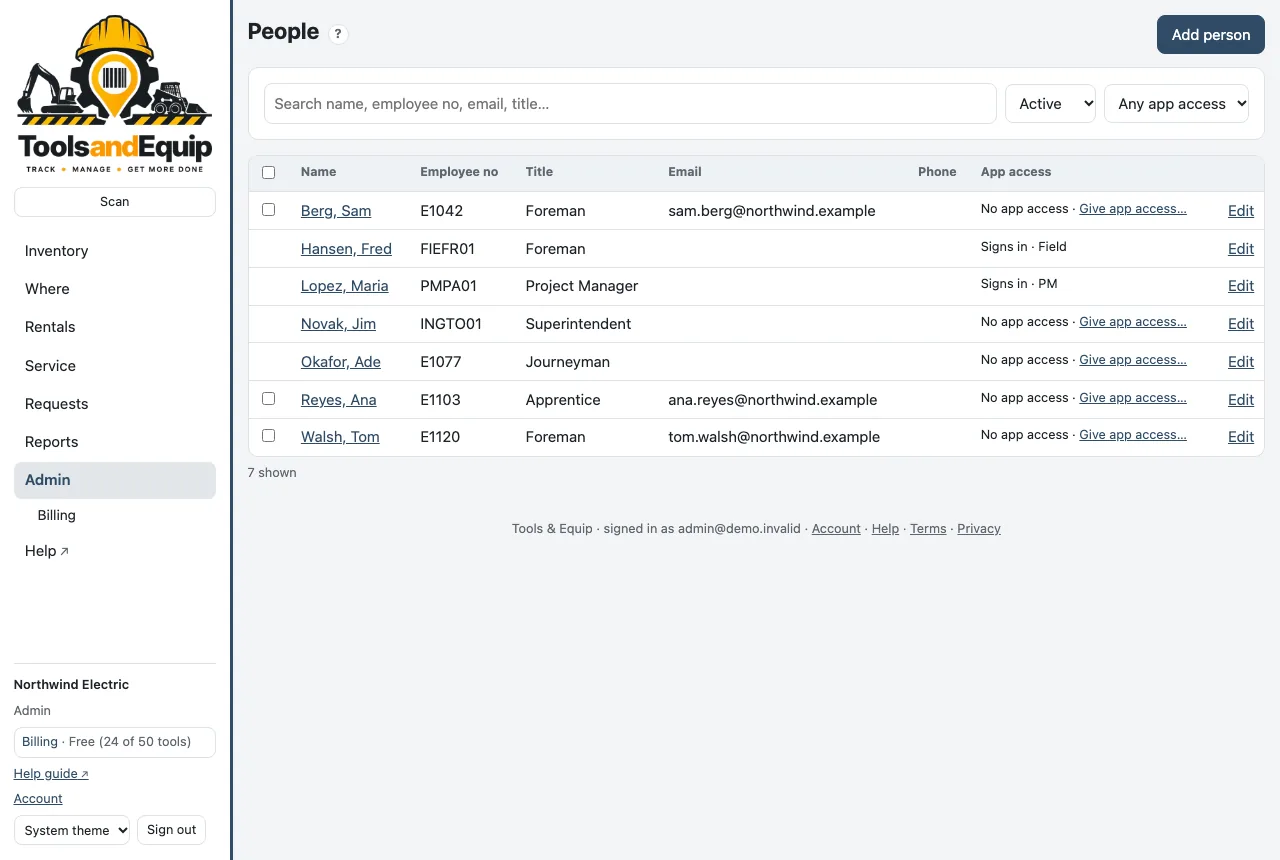
Add or edit a person
Who can do this Admin and Crib (People). The "Can sign in" box: Admin (Members).
- On People, press Add person (or Edit on a row).
- Fill in the Name and anything else: preferred name, employee number, email, phone, title, occupation. Tick Field lead for a foreman who holds tools for a crew. Choose a Calendar color if you want their bookings to stand out on the calendar.
- To let them sign in, tick Can sign in to Tools & Equip and pick a role. They need an email. On Save they are invited by email.
Someone left? Open them and press Deactivate. Tools in their name become Unassigned so you can find them.
Invite many people at once
Who can do this Admin (Members).
- On People, set the app access filter to No app access.
- Tick the people to invite (the box in the header ticks everyone shown who is active and has an email).
- Pick the Role in the bar and press Give app access to N people. Confirm.
Each person gets an invite email. One email address is one login: if two people share an address, the second is left out and named.
Members and invites
Who can do this Admin (Members).
- Invite: type the email under Invite by email, pick a role, press Invite. The invite lasts 30 days.
- Change a role: pick a new one in the Role column. It saves at once.
- Suspend: set Status to suspended. They can't sign in until you set it back.
- Remove: they no longer see the company. What they recorded stays.
- Open invites: Resend invite (renews it for 30 days; up to 3 emails per address a day) or Withdraw.
Roles and rights
Who can do this Admin (Roles).
Admin → Roles shows a grid: the rights down the side, the roles across the top. A tick saves straight away, with Undo in the message. The Admin role is locked: it always has every right.
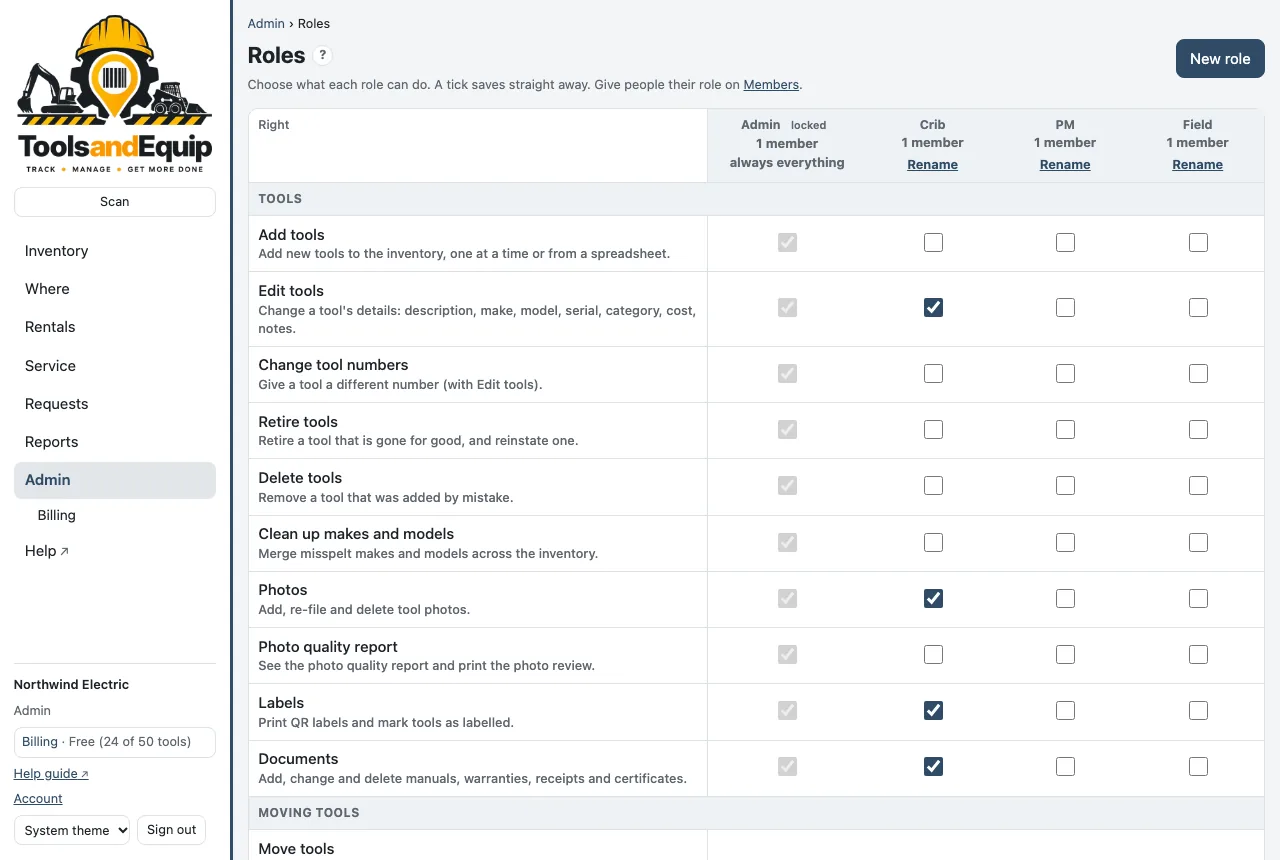
The built-in roles start like this (✓ = has the right):
| Right | Admin | Crib | PM | Field |
|---|---|---|---|---|
| Look up the whole fleet, raise requests, comment | ✓ | ✓ | ✓ | ✓ |
| Book tools, add rentals | ✓ | ✓ | ✓ | – |
| Own jobs (PM): their jobs' requests, rentals and cost | ✓ | – | ✓ | – |
| Move tools (check out/in, repair, missing, signatures) | ✓ | ✓ | – | – |
| Edit tools, photos, labels, documents | ✓ | ✓ | – | – |
| Kits, audits, manage bookings | ✓ | ✓ | – | – |
| Record service, service plans, work orders | ✓ | ✓ | – | – |
| Work requests, manage all rentals | ✓ | ✓ | – | – |
| Issue, receive, count and manage consumables | ✓ | ✓ | – | – |
| Jobs and People lists (and their imports) | ✓ | ✓ | – | – |
| Cost to jobs report | ✓ | ✓ | – | – |
| Add, renumber, retire and delete tools | ✓ | – | – | – |
| Locations and Categories lists | ✓ | – | – | – |
| Set charge rates | ✓ | – | – | – |
| Clean up makes and models, photo quality, merge people, delete any comment | ✓ | – | – | – |
| Members, Roles, Company look, Billing, Audit log | ✓ | – | – | – |
| Pending transfers, Confirm for someone (receivers accept transfers) | ✓ | – | – | – |
The Roles page explains each right in a line. Your company may have changed these, so the grid there is the final word.
Custom roles
- Press New role. Give it a name, like "Foreman", "Shop lead" or "Office".
- Start from Nothing ticked or A copy of another role, and press Make the role.
- Tick what it may do. Then give people the role on Members.
Rename, Reset (built-in roles back to how they started) and Delete (custom roles; its members move to a role you pick) sit under each role. You can only tick rights you have yourself, only an admin can make someone an admin, and a company always keeps at least one admin.
Features
Who can do this Admin (Features). Everyone sees what is on: the menus follow it.
Admin → Settings → Features turns the optional parts of Tools & Equip on and off for your whole company. Not everyone wants to see everything: if your crew never books tools ahead, turn off the Calendar; if requests go by phone call, turn off Requests.
- Included parts, on unless you turn them off: Calendar (bookings), Requests, Rentals, Kits, Consumables, Audits, Work orders, Documents and Charge-back (cost to jobs).
- Insurance and proof of ownership, off until you turn them on: Purchases & receipts, Insurance claims and the Proof of ownership report.
A part that is off disappears everywhere: the menu, the Reports and Admin pages, the tool page, the inventory's buttons (for example Reserve… and Add to a request…), the warning before moving a booked tool, its emails, and the phone app. A link to it says "This feature is turned off — an admin can turn it on in Settings → Features." Nothing is deleted: turn it back on and every booking, request or record is there again.
The inventory, moving tools, Service & inspection, labels and scanning are always on. Receivers accept transfers keeps its own setting below.
The new parts come with their own rights in Roles: Purchases and receipts, See insurance claims, Insurance claims and Proof of ownership report. Only the built-in Admin role has them at first; tick them for Crib or PM if they should have them.
Receivers accept transfers (company setting)
Who can do this Admin (Pending transfers). Everyone can see whether it is on.
Admin → Settings → Receivers accept transfers. Off by default: everything moves at once, as always. Tick it and a tool checked out or handed to a person waits until that person accepts it (see Moving tools). Some companies want that proof, some don't: it's your choice.
- Also for request pickups: closing a filled request waits until the requester accepts the pickup (Requests).
- Allow "Confirm for someone": lets people with that right record a receiver with no phone or login took the tools, with a note. Off: only the receiver's own device or accepting in person counts.
- Ask for a signature when accepting in person: off by default. Off: Accept now shows the receiver's name and an Accept button, recorded as Accepted in person on {name}'s device (no signature). On: the receiver signs on the giver's screen. Receivers who accept on their own device never sign either way.
- Remind the receiver: after 4, 8 or 24 hours, 2 or 3 days, or never.
Two rights go with it in Roles (under Moving tools): Pending transfers (this setting, every waiting transfer, cancel and resend) and Confirm for someone. The built-in Admin role has both; tick them for Crib if your crib should have them. Turning the setting off doesn't touch transfers already waiting: they can still be accepted or canceled.
Company look
Who can do this Admin (Company look).
Admin → Company look puts your logo and colors on the website and in the phone app, for everyone in your company.
- Upload your Logo: PNG, JPEG or WebP up to 2 MB, at least 600 px wide; a transparent PNG looks best. Optional: a Logo for dark backgrounds and a Square icon.
- Set the Name shown, a Short name, the Main color (buttons, links) and the Accent color. The preview shows light and dark, with a contrast check.
- Press Save. The app shows it the next time it opens. Use the built-in look undoes it.
Jobs, locations and categories
Who can do this Jobs: Admin and Crib (Jobs). Locations and Categories: Admin. Everyone can look at the lists.
- Jobs: Add job with a number (leave blank if it has none yet), name, PM, city, state and status. Close a job when it's finished; closed jobs aren't offered for check-outs. Click a job number to see the tools on it.
- Colors: a job or a person can have a Calendar color (on its form, or click the color dot at the start of its row). It colors their bookings on the calendar when it is colored by job or person (see Reservations). Who can set it: whoever has the Jobs right (for jobs) or the People right (for people). In test mode the color is the one thing you can change on a real job or person.
- Locations: Add location with a name and a kind: storage (yard, crib, trailer), shop (your repair shop), vendor (outside repair or rental) or other. Lower sort numbers show first. Untick Active to hide an old place.
- Categories: Add category with a code (1 to 4 letters or digits, like 45) and a name, plus service and inspection intervals that every tool in it inherits.
All of these can come in from a spreadsheet: see Imports.