
On this page
Raise a request
Who can do this Everyone with Raise requests (by default Admin, Crib, PM and Field).
- Open Requests and press New request.
- Say What is needed, for example "Two generators and a light tower for Monday".
- Pick the Kind: Needs equipment, Needs repair, Problem, Ready to be picked up or Being dropped off.
- Set the Priority (urgent, high, normal, low), the Job, the Superintendent and Needed by.
- Optional: list the exact tools under Items: type part of a tool's number or name and press Add next to it, press Enter on a number or barcode, or press Scan. A tool that is already on someone else's open Needs equipment request can't be listed again; the message says whose request it's on.
- Press Raise it. You can also press Request this… on a tool in the phone app.
Field crews see the requests they raised. PMs also see what is happening on their own jobs.
Email or push about new requests depends on your company's notifications. If the confirmation says no email is sent yet, tell the crib yourself.
Work a request (crib)
Who can do this Admin and Crib (Work requests).
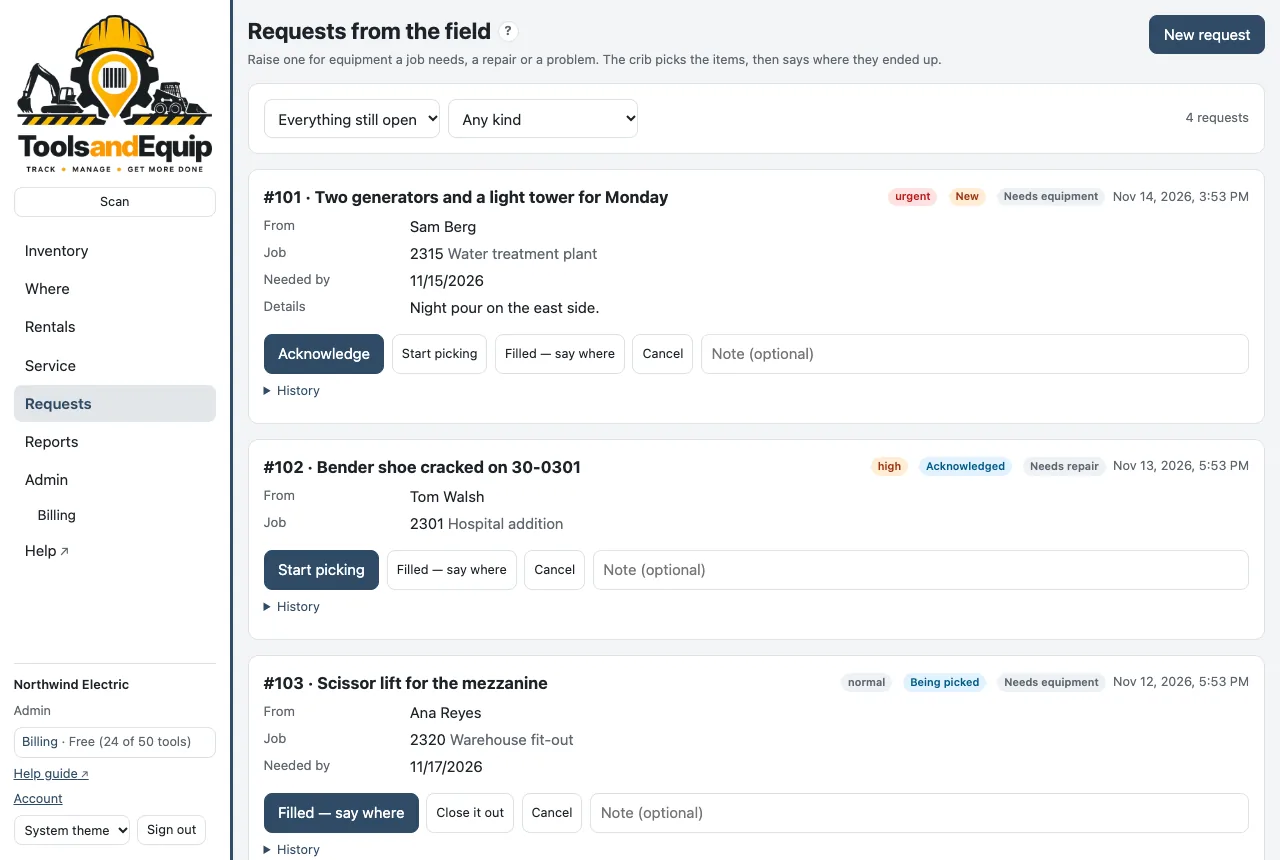
Requests move through New → Acknowledged → Being picked → Filled → Closed (or Canceled). Urgent ones sort to the top.
- Open the request and press Acknowledge so the requester knows it's seen.
- Start picking while you pull the tools, and put each one on the request's pick list (below). You don't have to move them yourself.
- Filled — say where: pick the place or job where the equipment is, and say it in your own words, like "on the flatbed, leaving at 6am". That line is what the requester is told. On a Needs equipment request this also checks the tools on the pick list out to the requester.
- Picked up — close when it's gone, or Close it out. Reopen brings a closed one back.
Fill a request with a pick list
Who can do this Admin and Crib (Work requests). Filling also needs Move tools, because it checks the tools out.
Build the request as you find the tools, in as many goes as you need (today, tomorrow, after the delivery comes in). Nothing moves until you press Filled — say where.
- Put tools on a request in any of these ways:
- On the request, press Add tools. Type part of a tool's number, name, make or model and press Add next to it, or press Enter on a tool number or barcode. Scan keeps the camera open: every label you scan goes on the list, then close the scanner.
- On a tool's page, press Add to a request….
- In the inventory, press Select for a request (Select tools if you can also book), tap the tools (across pages and searches), then Add to a request…. A tool booked soon for another job or person gets a warning first (Moving a booked tool).
- Choose An open request (urgent ones first, then the newest; search by number, what is needed or who asked), or For a person. For a person, their open request is offered; otherwise choose New request for them (Needs equipment, the job is optional). They are the requester: they see it and are told about it, as if they had raised it.
- The tool stays where it is. Its page says On request #123 for Fred (being picked) and the inventory shows #123 → Fred, so nobody else grabs it. The first tool on a New or Acknowledged request sets it to Being picked.
- Changed your mind? Press remove next to the tool on the request, or Take it off the request on the tool's page.
- When it's all there, press Filled — say where, pick the place or job and add a note. The box tells you what is about to happen. At that moment every tool on the list is checked out to the requester, on the job you picked (or the request's job). If you picked a place, they stay staged there in the requester's name. Each tool gets one line in its history: Filled request #123 for Fred: on the flatbed, leaving 6am.
- The requester is told it's filled, with where it is, your note and the list.
- One open request per tool. A tool can be on only one open Needs equipment request. Adding it to another says 45-0002 is already on request #123 for Fred (being picked). Take it off that request first. The other tools you chose still go on. Repair and problem reports can name any tool.
- More after it's filled. Press Back to picking, add the rest, and press Filled — say where again. Only the tools that aren't with the requester yet move.
- Not moved (the request's history says why): tools already with the requester, retired tools, real tools in test mode, and kit contents whose kit is on the list too (they go with the kit).
- Close it out isn't offered while you are picking a list, because it would skip the move. Press Filled — say where first.
- Only Needs equipment requests move their tools. On the other kinds the list is just a list.
- With Also for request pickups on (below), nothing moves when you fill it. The tools go to the requester when they accept the pickup.
Each tool's history keeps the proof: Added to request #123 for Fred (and who added it), Removed from request #123, and the check-out for the request.
What the requester sees
On Requests (website and phone app) the requester sees their request's pick list with where each tool is right now, and once it's filled, Where it is with the crib's note. Only the crib can change the list.
When the requester must accept the pickup
With the company setting Receivers accept transfers and Also for request pickups on (Admin → Settings), Picked up — close on a Filled request (kinds Needs equipment and Ready to be picked up) doesn't close it straight away:
- The request stays Filled and says Pending: waiting for {name} to accept the pickup. The requester gets a push and an email.
- The requester presses Accept on their phone or computer (under Transfers, or the To accept list in the app). Or, at the crib, press Accept now with them there (they sign on your screen if your company asks for a signature).
- Then the request closes. The tools on the pick list are checked out to the requester (and the job, if one was given), and the history says who accepted it and how: that's the proof it was picked up. (With this setting on, Filled — say where moves nothing; the acceptance does.)
If they decline, the request stays Filled and you see why. Changing the request to anything else (Back to picking, Cancel) calls off the waiting pickup. Requests with no items still need the acceptance; nothing moves, the request just closes. A requester with no login can only accept in person.
Who can do this Closing: Admin and Crib (Work requests). Accepting: the person who raised the request. Accept now: anyone with Move tools.
Rented equipment
Rentals keeps a record of equipment hired in from a vendor, so nothing stays on rent by accident. The tiles show what is on hire, what should be back already, what is on jobs, and the cost so far.
Who can do this Admin, Crib and PM can add rentals and change the ones they added (Add rentals). Admin and Crib see and change every rental and can cancel one (Manage all rentals). A PM sees the hire on their own jobs.
- Press Add a rental.
- Fill in What has been hired, the vendor and their reference, the job and person, On hire from, Expected back, and the rate per day, week or month.
- Press Add it.
- When it goes back, press Returned, give the date and, if you have the invoice, the Final cost.
Without a final cost, the page shows an estimate from the rate and the days on hire (marked with ~). It is not an invoice.